
I started out thoroughly determined to be a DIY bride. Dress, cake, catering… oh sure, I can do it all. I’ll even hand-carve my own arbor and grow my own flowers while I’m at it. Motivation is a wonderful thing– especially when it is hilariously combined with an unrealistically optimistic view of my own personal skills.
After making my fiance’s birthday cake, which did turn out lovely, I realized that I simply couldn’t do something as large as a wedding cake. After loosing interest in the teddy bear I had been sewing together from scraps, I realized that maybe a dress was a bit too much of an undertaking. I also realized, with sadness, that I would be purchasing much of my items from retail venues such as JoAnns, and aside from the effort, I would have little cost difference. So I caved, but I caved all on my own…so that’s some DIY consolation!
I primarily wanted to be a DIY Bride to save a little money and to add a personal touch to our wedding that you simply cannot get from a box at the store. I decided, among a few other projects, that I would do DIY Save the Date magnets.
Save the Dates are very useful for your out of town guests, but now-a-days they are being sent to everyone. It’s basically a pre-invitation, and just another way to suckle a little money out of people trying to start a new life together. Well, suckle away! Because I made them!
First, I was inspired by a photo of this adorable couple literally saving their date…and HAD to do it. So at our engagement photo shoot I asked our photographer to take a few photos of us doing the same (or as best we could). Though I’m sure anyone with a digital camera could do the same.
I used GIMP to edit the photos. It’s basically a type of free Adobe Photoshop, and I love it.
Original:

My edited version!:

After that, I printed 80 wallets. I get photos printed for free at work, but it’s .99 cents per print (four pics per sheet) at snapfish. Though you could also do 4x6s which are very cheap most anywhere (around 9 cents each).
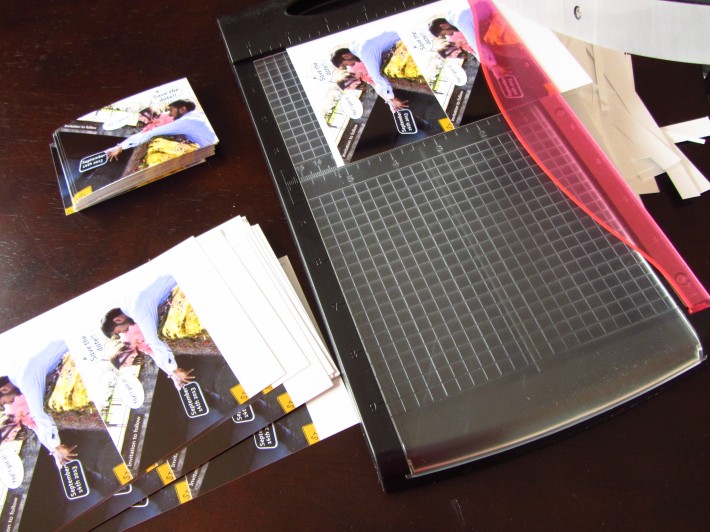
I decided to buy a x-acto paper cutter to chop up my wallets, primarily because I didn’t have one and I know I’ll use it for other projects. Though most libraries have them, and so you can save that cost as well. The one in the photo below cost me $15 at the store.

I bought 100, 15 mil 2.5″ x 3.5″ (wallet size) adhesive magnets from lyt, and the service was fast and the product worked awesome. It cost me $30 and $6 for shipping. You can buy less quantity– I just have a large guest list. If you decided to go the 4×6 route, it’ll cost you an extra 10$ for 100 adhesive magnets.

It was so easy to put them on, and it went so quick (considering how many I had)! I just took off a small section of the sticker backing to line up my photo, and then removed the rest. I used my x-acto to re-cut my inevitable mishaps. The adhesive is nice and strong, but didn’t gum up my x-acto, and I only had to discard two of my magnets because I got a little cut-happy with the x-acto.
Final Cost:
Wallets: $0.00 (80)<-these are about .25 cents each normally, or 9 cents for the 4x6s
X-acto: $15.00 <-maybe use a friend’s, libraries, or Kinko’s for free?
Magnets: $36.00 (100) <-you can get different quantities, and it’s only $10 more for the 4×6 size.
Labor: $0.00 (about 3 hours total)
51 cents each! and I have 20 magnets left-over for something else.


Hi what format did you save the image on and what did you print it on
Just a .JPEG (.JPG) and printed as a wallet at a photo printing place.